

How To Make A Photoshop Timeline Animation Go Slower
Dealing with GIFs may seem daunting at showtime considering they aren't static like the images you ordinarily edit. When I first had to piece of work with a GIF I was amazed by how easy it was to edit it in Photoshop. When it comes to GIFs, a skilful skill to take is knowing how to change GIF speed in Photoshop.
To change the speed of a GIF in Photoshop, first, open your GIF file, then go to Window > Timeline. In the Timeline panel, click the beginning frame, hold Shift, then click the last frame to select the whole GIF. Now click the frame delay setting and choose a new fourth dimension to speed upward or slow down your GIF.
A GIF (Graphics Interchange Format) is an blithe image fabricated from diverse layers. When the layers are placed together they create a moving image. You tin edit a GIF to make information technology longer by slowing down the speed (frame rate) of the layer change or speed it upward by shortening the gaps betwixt the layer changes.
Editing a GIF in Photoshop is simple and here is all you need to know virtually changing GIF speed.
How To Open A GIF In Photoshop
Opening a GIF in Photoshop is as easy as opening a normal image, nevertheless, the GIF will appear in layers rather than every bit one epitome. Once your GIF is opened in Photoshop, you lot volition be able to edit the individual layers, the sequence of the layers, and the speed at which the layers change.
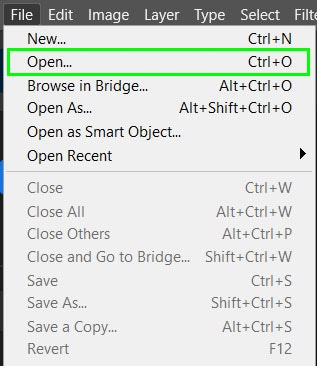
To open up a GIF, go to File > Open or press Control + O (Win) or Command + O (Mac).
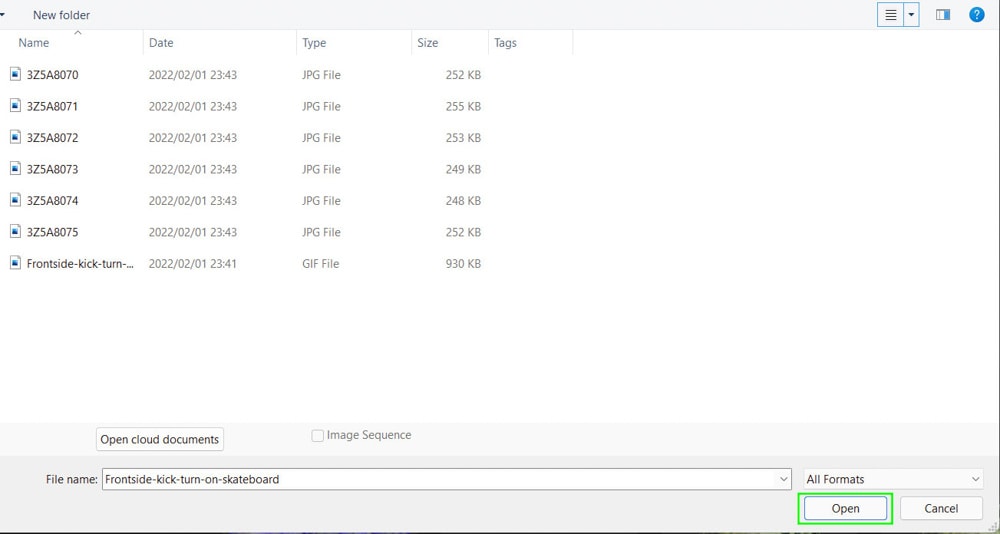
Once Windows Explorer or the Finder app opens, notice the GIF file you want to open up on your figurer.

If you tin't find the file in the correct location, brand sure the file blazon is fix to All Formats at the bottom of the window.
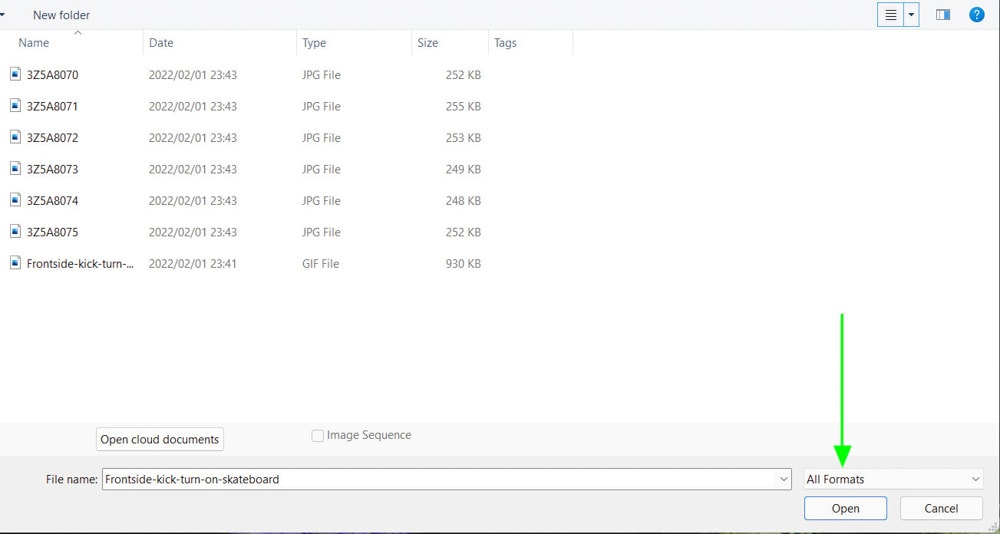
Now that the GIF file is visible, select information technology and click on Open.
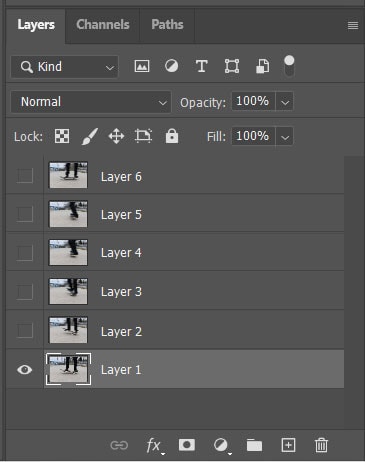
When the file opens in Photoshop, the Layers panel will show the various layers that were used to create the GIF.
If the GIF opens equally one layer, you may have selected the wrong file. Make sure the file format says GIF before you open the file.

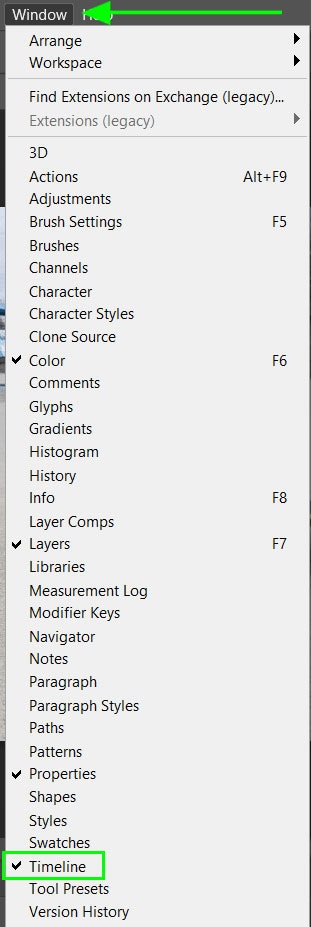
To view the frames of the GIF, which is where you lot will edit the speed of the GIF, open the Timeline past navigating to Window > Timeline. A checkmark indicates that the window is open.
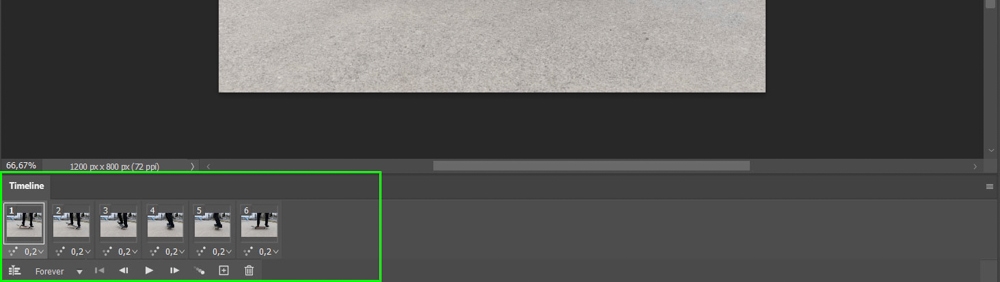
Once the window is selected, a new panel volition appear at the bottom of your workspace. This console will show the frames that appear in the GIF, based on the layers you see in the Layers panel.
How To Speed Upward Or Slow Down A GIF In Photoshop
Once the GIF file is open up in Photoshop, you can edit the layers and the frames including the speed at which the frames modify. This will create a longer or shorter sequence for your GIF.
You can change the speed of private frames which gives yous the flexibility to have the frames alter at different speeds. Yous can besides modify the frame rate of all the frames in i go, which is quicker if your aim is to alter the frames to the same speed.
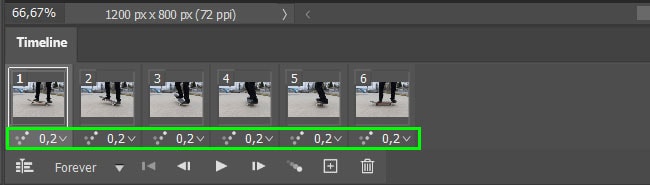
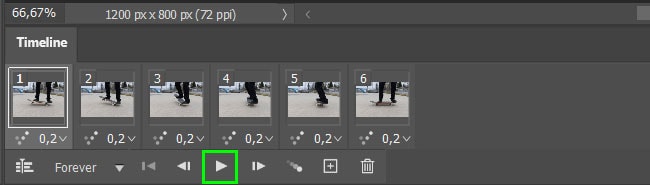
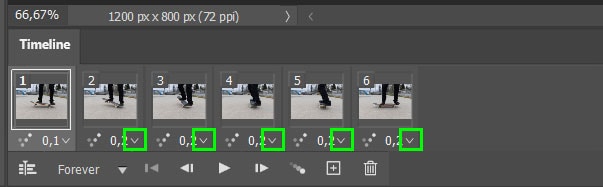
Currently, each frame is set up to announced for 0.2 seconds before changing to the next frame.
To see how fast or slow the GIF moves, press the Play icon in the Timeline panel. This volition play the GIF in your workspace.
How To Change The Speed Of Every Frame
If you are aiming to increase or decrease the speed of a GIF while keeping the delay (or frame rate) betwixt frames at the same speed, yous can modify them all at once.
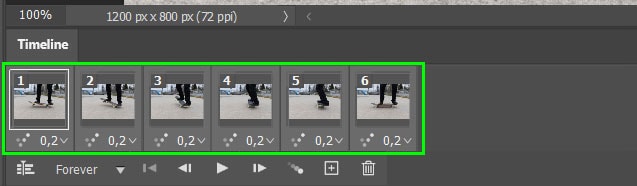
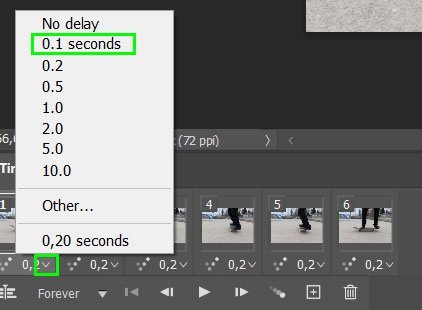
To speed upwards the GIF you lot need to subtract the time delay (or frame rate) betwixt the frames. To modify the frame rate in bulk, agree in Shift while clicking on each frame to select them all. The frames will be highlighted to prove that they are all selected.
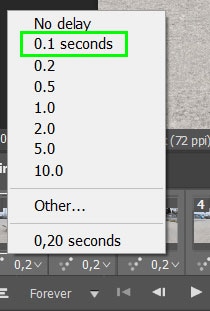
Next, click on the arrow adjacent to the time in the outset frame and select a faster time, which in this example volition be 0.1 seconds.
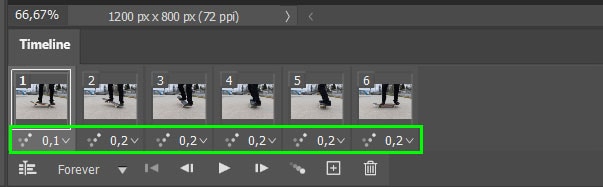
All the frames will now show the new time delay which has been set at 0.1 seconds.
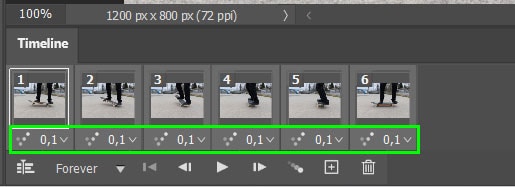
You volition detect the time between each frame is shorter, which causes the speed of the GIF to increase.

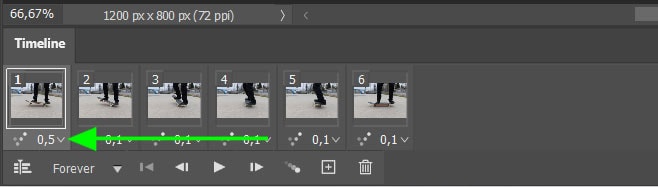
To slow down a GIF, you volition need to increase the amount of time that each frame is shown. This volition cause the GIF to motion slower than the original.
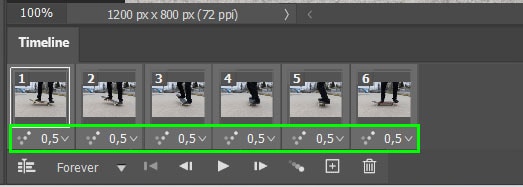
To do this you will need to increase the time filibuster (or framerate) between the frames. Increase the fourth dimension delay by holding in Shift and selecting each frame before setting the time filibuster at a longer time, such every bit 0.5 seconds.
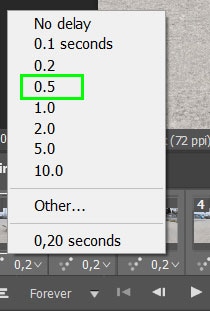
Once the time filibuster has been selected it will modify the time on all the frames, this will crusade the GIF speed to be slower than before.

How To Change The Speed Of Single Frames
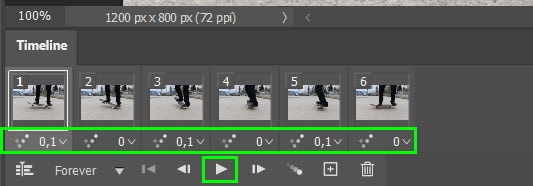
You can also change the delay between each frame individually. This is helpful if you lot want the frames to change at dissimilar rates. To individually change the frame rate, brand sure that only the outset frame is selected, and then select the arrow side by side to the time and cull a faster fourth dimension.
One time you select 0.1 seconds, the showtime frame volition indicate this time, however, the rest of the frames are even so ready at 0.ii seconds. This will only shorten the time that the first frame is visible without affecting the balance of the frames.
Select the arrow next to the times on the balance of the frames and change them to the time delay you desire.
Once the times have been changed on all of the frames, press the Play icon to test the speed of the GIF.
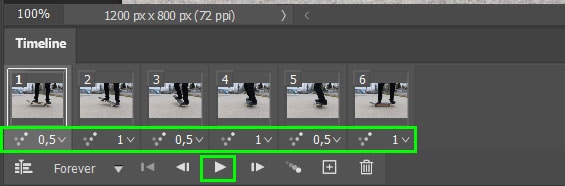
You can likewise change each frame rate to wearisome down the GIF with the frames set to unlike fourth dimension delays. To practise this, select the arrow next to the time in the first frame and choose a longer filibuster, such every bit 0.5 seconds.
Increase the time filibuster for the remainder of the frames at the rates you would like to ho-hum the unabridged GIF down. Then press the Play icon to come across the new effect.
How To Consign Your GIF From Photoshop
Once you lot are happy with the time delays of your frames, you lot need to consign the file into a GIF format. If y'all just salvage the project as a PNG or jpeg, the prototype will not move like a GIF.
To export your GIF, navigate to File > Consign > Relieve for Web (Legacy). You can also printing Command + Shift + Alt + Southward (Win) or Control + Shift + Selection + Due south (Mac).
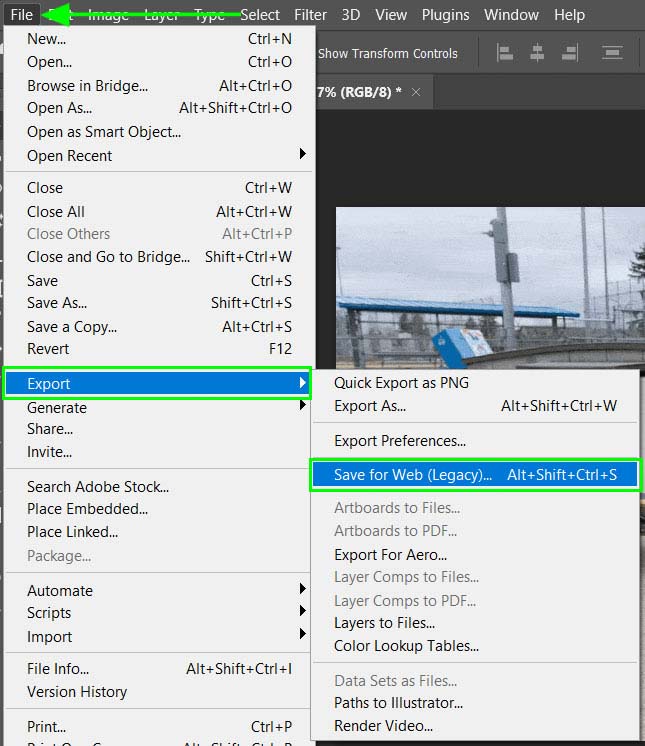
This volition open the Save for Web window which allows you to salvage your project as a GIF and gear up the parameters of the GIF.
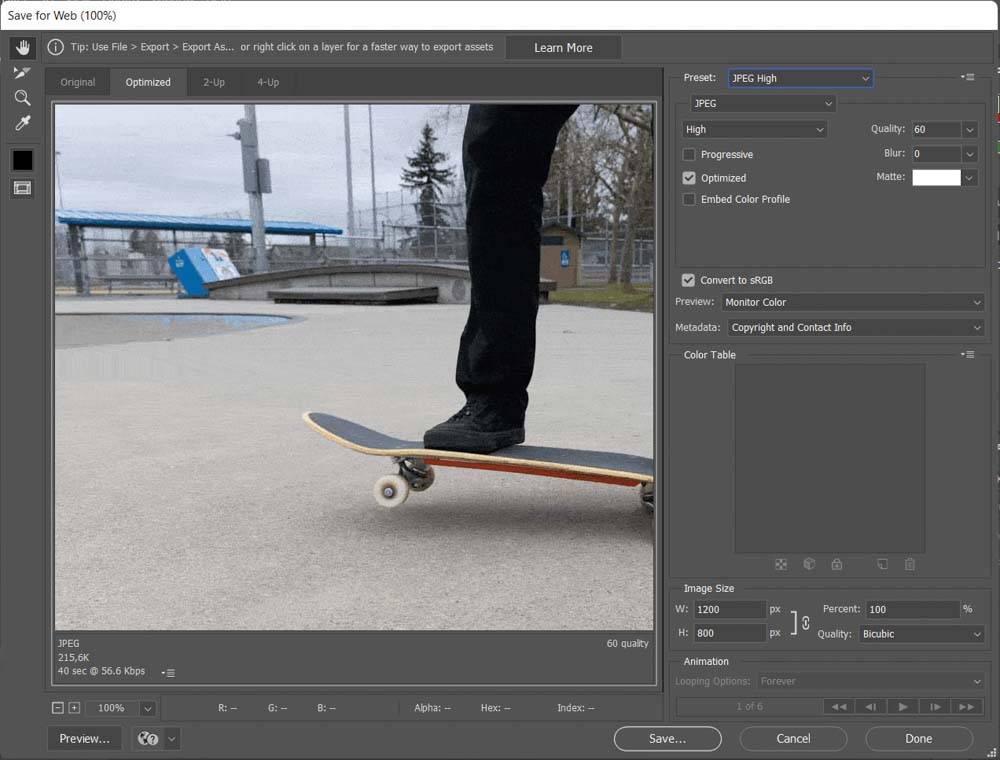
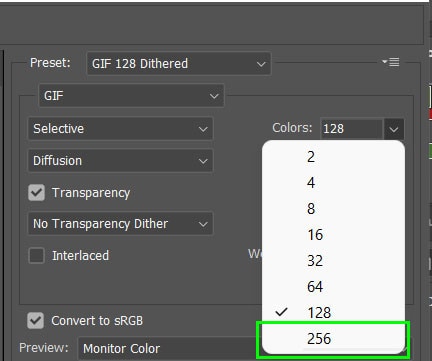
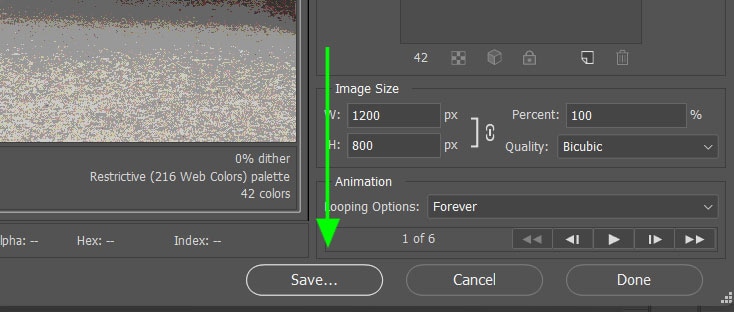
In the Save for Web window, select the drop-down menu side by side to Preset to set the format to GIF. You will notice there are different options available for GIF file formats. These include Dithered and No Dither likewise as different colour ranges, indicated by the numbers.
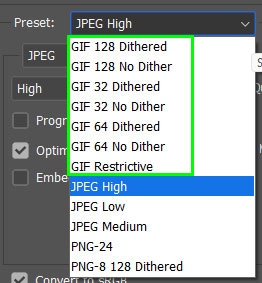
The numbers next to the GIF options indicate how many colors will be included in the GIF.
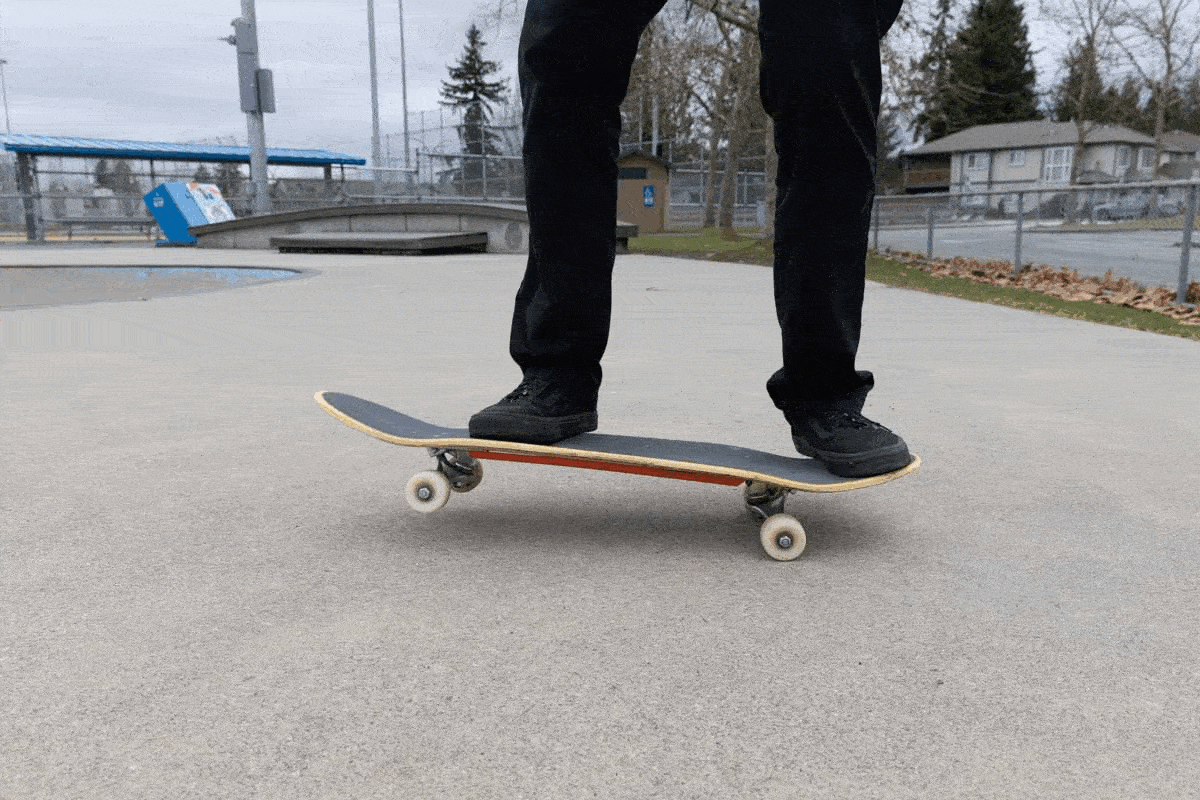
Choosing a depression number will decrease the file size of the GIF, but will too limit the number of colors in the GIF. This volition grayness certain parts of the paradigm, such as the orange at the bottom of the skateboard and the blueish areas if at that place are not enough colors.

A college number of colors will increment the file size but the GIF volition take more than vibrant colors. The colors included in the GIF will also exist shown in the color table.
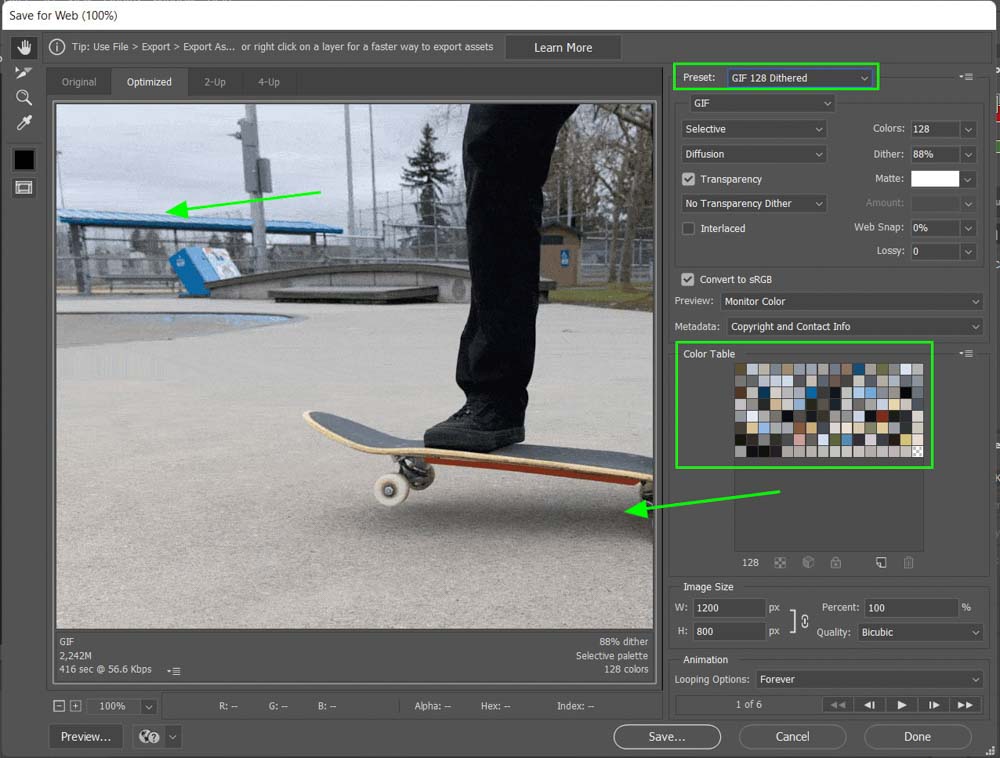
To increase the colors to 256, which is the maximum for GIF images, click on the Colors slider and select 256. This will include a wider range of colors in your GIF.
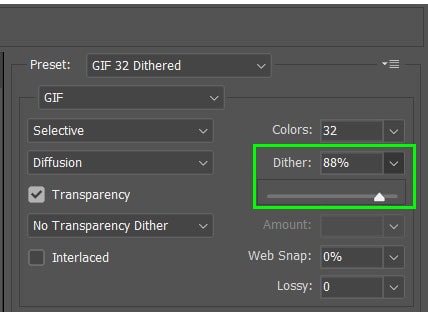
When choosing the type of GIF, y'all will also have the choice betwixt dithered and no dither. This volition affect the quality of your GIF. These dithering options are available due to the limited color palette for GIF files.
The dithered option improves the quality of the GIF by using two bachelor colors from the color palette to create a shade of a 3rd color past grouping the available colors close together or in certain patterns. This outcome creates a higher-quality GIF that appears more natural.

You can as well modify the amount of dithering in the GIF, by moving the dither slider to the right to increase information technology or to the left to decrease it.
The no dither choice volition make full in the missing colors with the closest available colour from the color palette. This may create a GIF that looks low-quality compared to the dithered GIF. Setting the option to no dither volition reduce the file size of the GIF, making it easier to use on websites and digital platforms.
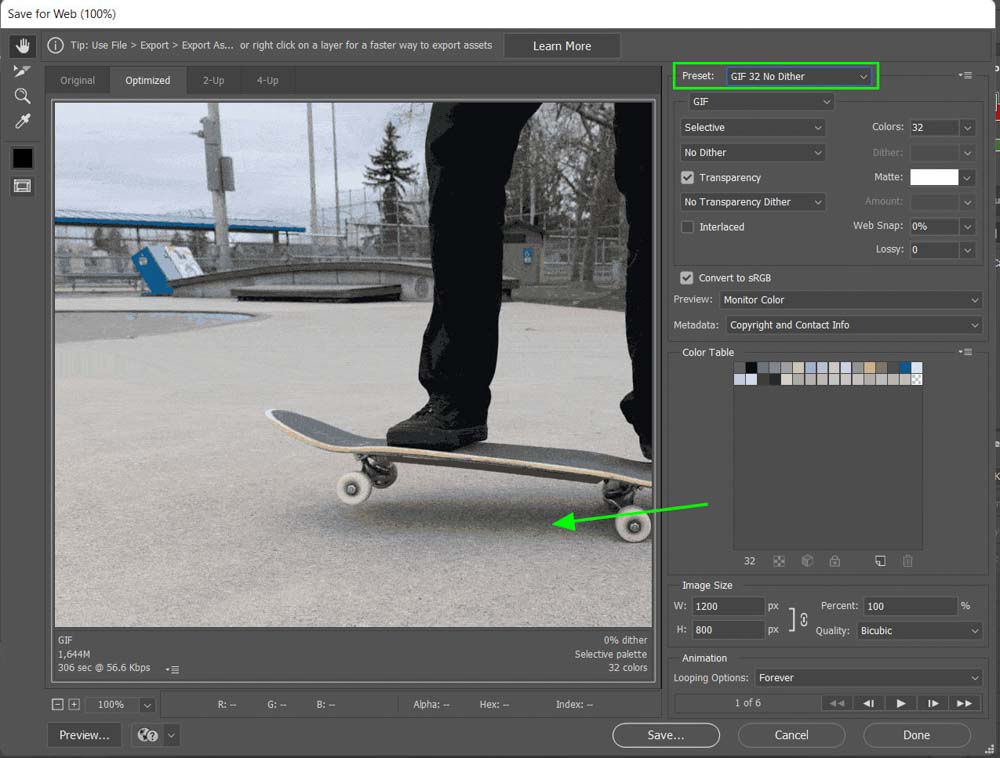
Whether y'all choose to use the dithered or no dither selection will depend on how important the quality of the image is equally well equally how pocket-sized the file size should be. Most GIFs have a low-quality expect to them and this is due to the nature of the GIF.
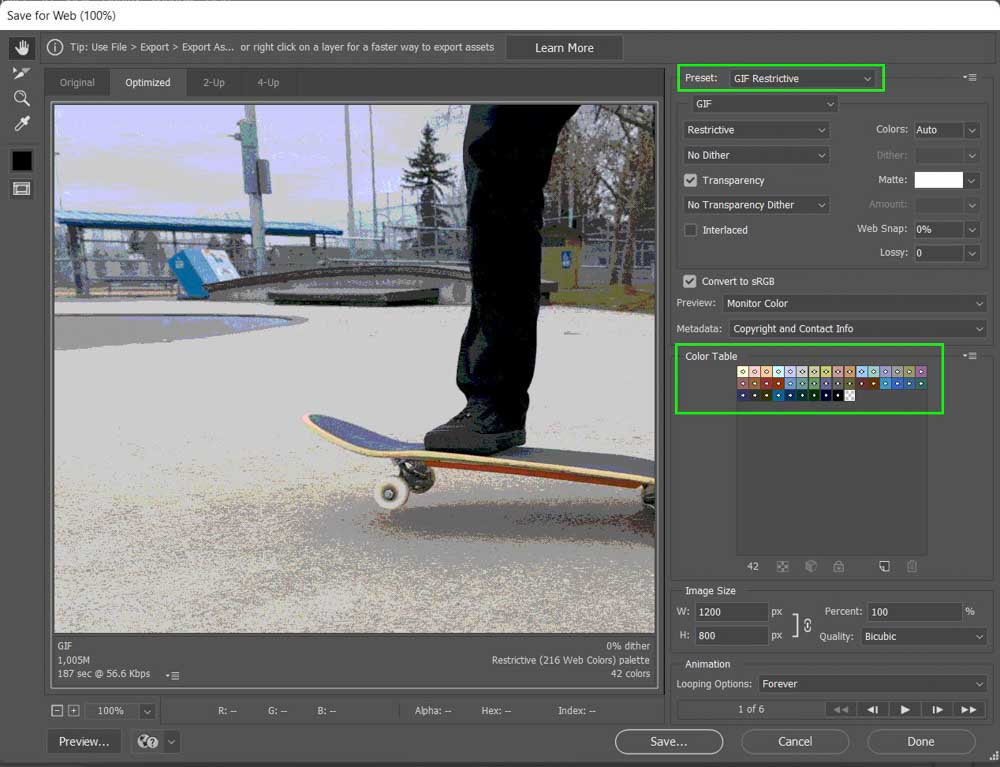
The last GIF format you can choose is GIF Restrictive. This option removes dithering from the GIF and applies a web-condom color palette to the file. You will find that the colors in the GIF are more vibrant, although the quality has dropped to a point where the GIF looks most blithe.
Once you take called the GIF settings you lot need, press Salve at the bottom of the window. Your Explorer or Finder will open and you can choose the right folder to relieve the new GIF in. The GIF volition now be saved on your estimator.
And then one time you have the frame rate of your GIF figured out, at that place are many exporting options depending on how you lot want the final effect to await! With the assistance of the timeline console, editing a GIF in Photoshop is quite straightforward, and irresolute the speed of your GIFs can be done in seconds.
Happy Editing!
Source: https://www.bwillcreative.com/how-to-change-gif-speed-in-photoshop/
Posted by: ramirezdadogiag.blogspot.com
0 Response to "How To Make A Photoshop Timeline Animation Go Slower"
Post a Comment